
This post has been prepared by Caro Ryan, the unexpected outdoors chick. She’s prepared some great packing and prep videos for hikers, so we wanted to share them with you all.
What to Pack for Day Hikes
There’s nothing quite like that feeling you get from stepping off the pavement, away from the hustle and bustle of everyday life and venturing out into the wilderness. The fact is, we all lead busy lives so for many of us, going out for a short bushwalk or day hike is all that we can manage. In this video I’m giving you a sneak peek inside my backpack to help you know what to pack for a day hike. I hope it helps!
Even if we have aspirations of spending more time away, building up to multi-day backpacking trips, spending just one day in the wilderness is a great way to get used to the feeling of a pack and learning about what works for you.
It’s also the best place to learn the basics so the step up to overnight trips is only a step… not a giant leap!
What to Pack for Overnight Hikes
If you’ve been out on day hikes a few times and found yourself thinking, ‘Gee, I wish I didn’t have to go back’, when the sun starts going down, it’s probably time that you jumped into overnight (and then extended) hikes.
Some people may think that this is a tricky thing to manage, but once you’ve got your Day Hike gear under control (above), there’s just a few things you’ll need to add to keep you warm, comfy and enjoying the great outdoors for just that little bit longer.
The key things to consider with the gear you throw in your pack for overnight trips are:
-
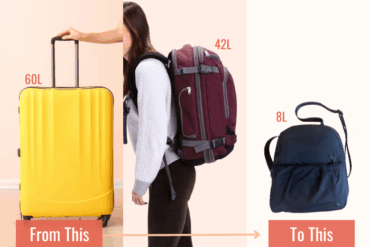
- WEIGHT: I try to keep my overnight/weekend pack to 10-12kgs + water. This is down from the original 16kgs+ that I started out with carrying over 15 years ago. Take it from me, the lighter your pack – the more enjoyable and long distance your trip will be.
-
- BULK/SIZE: You may pack lightweight, but a 55 litre pack still has limits on how much it can hold.
-
- IS IT MULTI-PURPOSE: A really smart way to look at things is, does each object have more than one use?
-
- DO YOU REALLY NEED IT: Overnight hiking/camping is a really good exercise in living a minimalist life. It teaches you how little we really need to survive (and thrive) in life.
-
- CAN YOU SHARE: When items like stoves can be the heaviest thing in your pack, it makes sense to share this type of thing amongst the group.
- SAFETY: It’s got to be number one and means that ensuring the basics of food, water, shelter and the essentials of telling someone where you’re going are adhered to.
Grab Caro’s Downloadable Printable Checklist: Click Here
What to Wear on a Hike
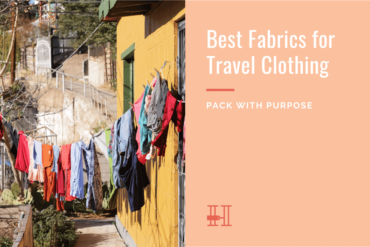
The best practice with outdoor clothing involves layers… Like an onion. The concept involves 3 main layers.
1. Base Layer
The base layer is the one directly next to your skin and the main purpose of this layer is moisture management. It’s all about fabrics designed to draw moisture (sweat) away from your body, so that you’re not wearing damp clothes all day and getting cold.
The main fabrics for base layers are merino and synthetics.
My personal favourite is merino, not only as a natural fibre, but generally it’s so lovely and soft and doesn’t leave you stinking of B.O. after a day out in nature, like its synthetic competition does.
I wear a merino t-shirt all year round and only in the cooler months of winter will I change this to a long sleeve t-shirt. Because of the style of walking I like to do, as soon as I start walking, I’ll be building a sweat within the first 1km.
The downsides to the lovely feel of Merino, is that it can tend to not be as tough and hardwearing as synthetic. You might notice this around the straps on a backpack or especially if you walk off-track through scrub.
Base layer for the bottoms is simply a pair of hiking pants. All year round I wear the same quick drying, lightweight, slightly stretchy pants. In cold weather I might start the day with a base layer underneath of merino leggings (thermals), which generally need to be de-layered (removed) within that first 1km.
At night time, after setting up camp, I’ll change into my “night base layer”, which is simply a fresh set of merino leggings and long sleeve merino top. Simply, a set of thermals.
2. Mid Layer
The mid layer is all about warmth and goes over the base layer.
Common fabrics for mid layers are again merino, fleece (synthetic) or down.
For me, I love a down (aka puffer) jacket due to their ability to be squished into very small spaces (they’re great to squeeze down around your other gear in your pack) and are lightweight. However, they generally don’t like getting wet, so a good shell layer is essential to ensure they still keep you warm in the rain.
All fabrics have positives and negatives, so as with everything I talk about, it’s important to find out what works for you and the environments that you’ll be in.
3. Shell Layer
The shell or outer layer, is designed to protect you from the elements.
Thank goodness for all those sciencey-type folk who spent years looking at waterproof fabrics and now, breathable as well. We’ve probably all called our raincoat a Goretex at times, but thankfully there have been more advances since this fabric was the bees knees.
Goretex, eVent and Hydranaute are now staples of the rain jacket shelves in our retailers. Oh and not just rain jackets, but rain pants also make up part of a full shell layer of gear.
The holy grail in my mind, is a rain jacket that is not only waterproof, but draws the sweat and moisture from inside the jacket to the outside – meaning its breathability. This is particularly important in Australian conditions where during our big February summer storms it will be pouring, while also 95% humidity and still 30C (86F). I’ve been known to just not bother with a jacket as I end up just as wet inside the jacket as if I wasn’t wearing one at all! Just about every manufacturer will tell you that their particular fabric can accommodate this, but I’m on my search to find the best one… More on that another time!
4. Accessories
The other layer to consider and put into your wardrobe is accessories. Things like:
- hats/beanies
- underwear
- socks
- gloves
- clothes for hiking
- My silly fleece hat keeps my head and ears toasty warm.
And because you all know I love a good safety tip, I am a massive fan of wearing colour in the wilderness. Being in Search and Rescue, I can’t tell you how often we’ve turned up for a search and been told that the missing hiker was wearing a grey or khaki shirt or worse, camo!
So next time you’re shopping, choose the brightest colours you can and use safety as your excuse for pitching that yellow, pink and orange ensemble you’ve always wanted to try.
Basic Food to Pack for Hiking
One of the big questions I get from people is: “What do I eat in the wilderness?”
For some reason, the old traditional tin of baked beans still gets mentioned in these conversations, but thankfully, the days of this heavy style of camping food is long gone. Now, it’s all about getting ‘bang for your buck’ in terms of nutrients vs. weight. Again, the lighter your backpack, the more enjoyable (safe and long-lasting) your outdoors adventures will be.
Yes, you can buy pre-prepared dehydrated or freeze-dried camping meals online or at your outdoor store, or you can make them yourself with a dehydrator. For the time poor amongst us, there’s a surprising amount of things you can buy in your supermarket (porridge sachets, pasta & sauce, sachets of tuna/salmon, etc) that well meet the task of eating well and providing your body with tasty and nutritious energy to keep you powering on up those big hills!
About the Author: Caro Ryan is the Sydney-based blogger behind lotsafreshair, a site all about bushwalking and hiking tips from an unexpected outdoors chick. Follow Caro on Youtube, Facebook or Twitter.


Leave A Reply